Getting the sizing right for chainsaw protection pants, chaps and other apparel is vital from both a comfort and safety perspective.
Note that Clogger garments are designed to be worn on the top of the hip bone, not at the natural waist.
Here are some approaches to getting your measurements right.
1. How to take body measurements for a custom garment
a. Instructions for male body measurements

What you need
- Flexible tape measure
- Self-adhesive dots x 4
- Paper and pen
- An assistant
It is OK to measure over the top of clothes, e.g. shirt and trousers, providing they are not thick and heavy.
Stand straight and upright with your eyes looking directly ahead.
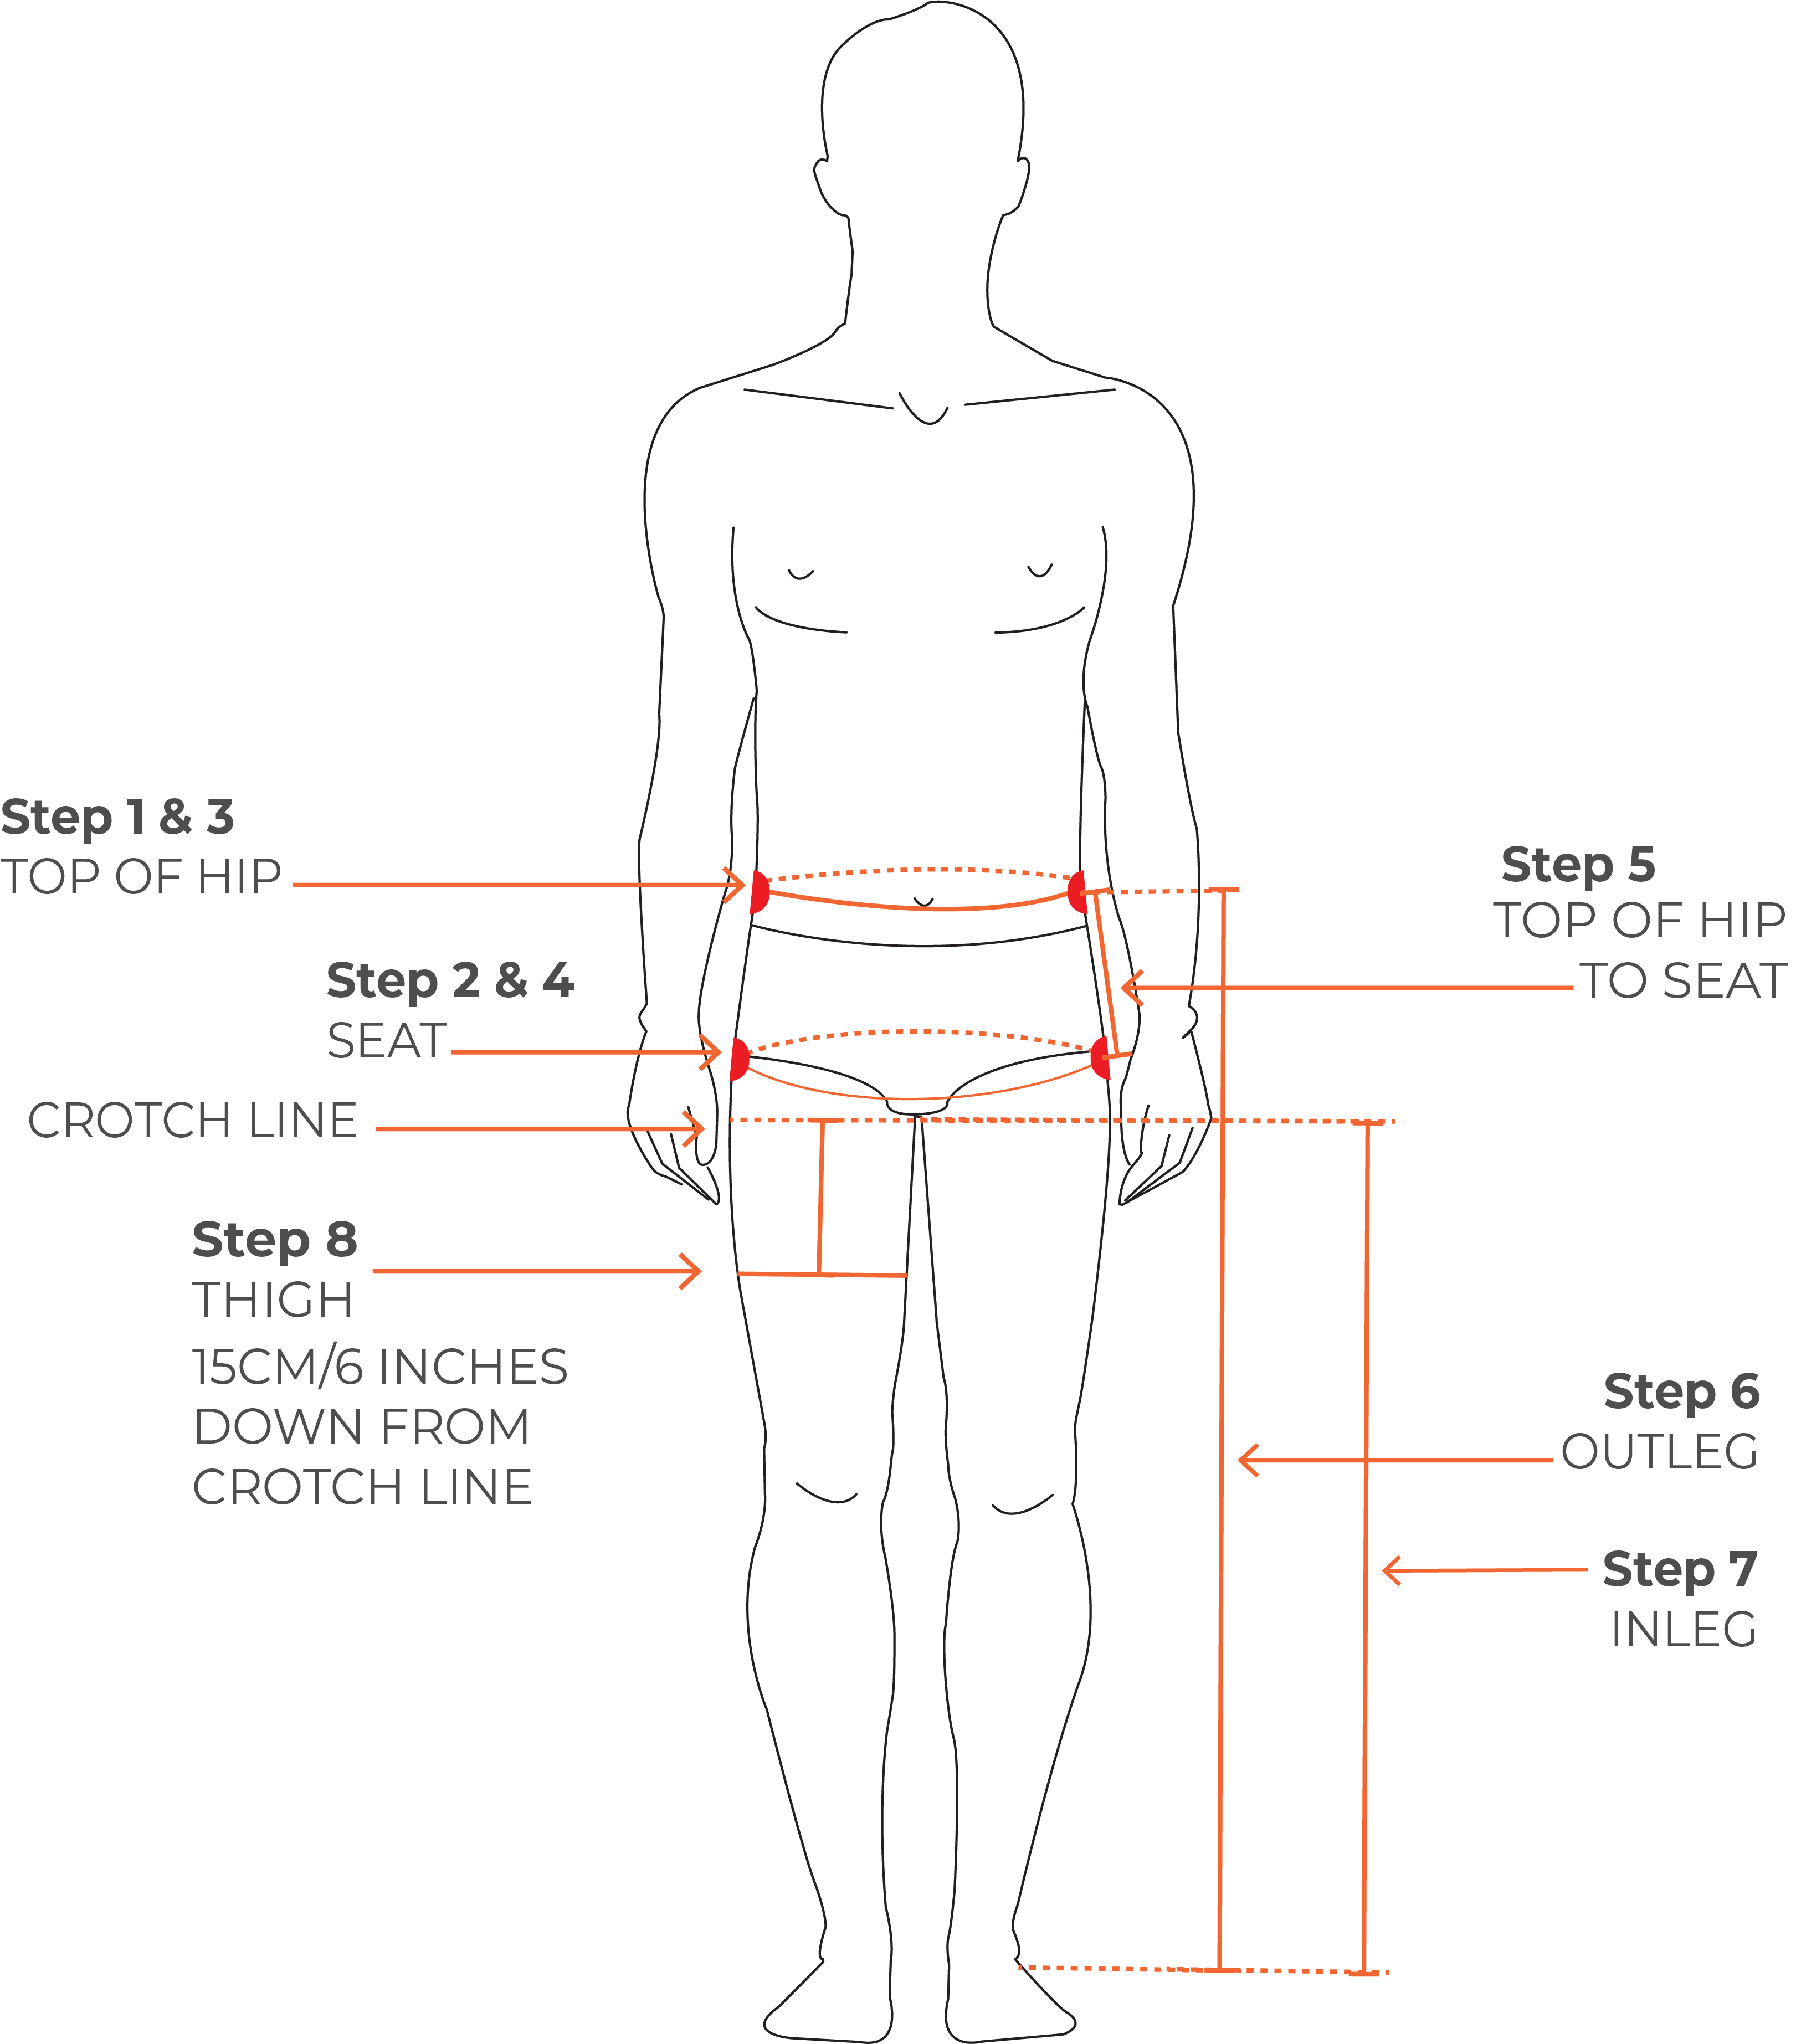
STEP 1: Get your assistant to find the top point of the hip bone on the side and place a sticky dot on this point. Do the same for the other side.
STEP 2: Place another sticky dot on the outside point of the hip bone level with the fullest part of the buttocks [refer to illustration]. Do the same for the other side.
STEP 3: Get your assistant to pass the tape measure around and measure your girth at the level of the top sticky dots. Make sure you are measuring from the ‘zero/0’ end of the tape measure! This is your ‘top of hip’ measurement.
STEP 4: Repeat for the girth at the lower set of sticky dots. This is your ‘seat’ measurement.
STEP 5: Measure the distance between the upper and lower sticky dots. This is the ‘top of hip to seat’ measurement.
STEP 6: The fourth measurement is the 'outleg'. While you are standing up straight, hold the ‘zero/0’ end of the tape on the upper sticky dot. Ask your assistant to read the tape at a point 2.5cm or 1 inch below the ankle bone.
STEP 7: Finally, we need the inleg. While standing straight and with feet slightly apart, hold the zero end of the tape at your crotch which is the point where your legs meet right at the top. Once again get your assistant to read the tape at a point 2.5cm or 1 inch below the ankle bone.
STEP 8 for custom chaps if top of hip circumference is greater than 140cm/55 inches: Starting from the crotch line at the centre front of the thigh, measure 15cm/6 inches down and mark this with a sticky dot. At the sticky dot measure around the full circumference of the thigh.
Record these measurements and compare with the sizing charts to see what size you should be ordering.
b. Instructions for female body measurements

What you need
- Flexible tape measure
- Self-adhesive dots x 4
- Paper and pen
- An assistant
It is OK to measure over the top of clothes, e.g. shirt and trousers, providing they are not thick and heavy.
Stand straight and upright with your eyes looking directly ahead.
STEP 1: Get your assistant to find the top point of the hip bone on the side and place a sticky dot on this point. Do the same for the other side.
STEP 2: Place another sticky dot on the outside point of the hip bone level with the fullest part of the buttocks [refer to illustration]. Do the same for the other side.
STEP 3: Get your assistant to pass the tape measure around and measure your girth at the level of the top sticky dots. Make sure you are measuring from the ‘zero/0’ end of the tape measure! This is your ‘top of hip’ measurement.
STEP 4: Repeat for the girth at the lower set of sticky dots. This is your ‘seat’ measurement.
STEP 5: Measure the distance between the upper and lower sticky dots. This is the ‘top of hip to seat’ measurement.
STEP 6: The fourth measurement is the 'outleg'. While you are standing up straight, hold the ‘zero/0’ end of the tape on the upper sticky dot. Ask your assistant to read the tape at a point 2.5cm or 1 inch below the ankle bone.
STEP 7: Finally, we need the 'inleg'. While standing straight and with feet slightly apart, hold the zero end of the tape at your crotch which is the point where your legs meet right at the top. Once again get your assistant to read the tape at a point 2.5cm or 1 inch below the ankle bone.
Record these measurements and compare with the sizing charts to see what size you should be ordering.